Top Tips for Welding 304 Stainless Steel
Welding 304 Stainless Steel demands more than a clean, attractive bead. This versatile austenitic alloy resists corrosion, yet heat, contamination, and poor gas coverage can weaken its performance. A bright weld may still conceal oxidation beneath the surface. That detail matters in food equipment, process piping, and architectural work.
This guide introduces practical methods used by experienced fabricators. It covers joint preparation, suitable filler metals, shielding gas, heat control, and post-weld cleaning. TIG welding often provides precise control for thin 304 sheet. MIG welding can improve productivity on thicker sections. The correct choice depends on thickness, position, equipment, and project requirements.
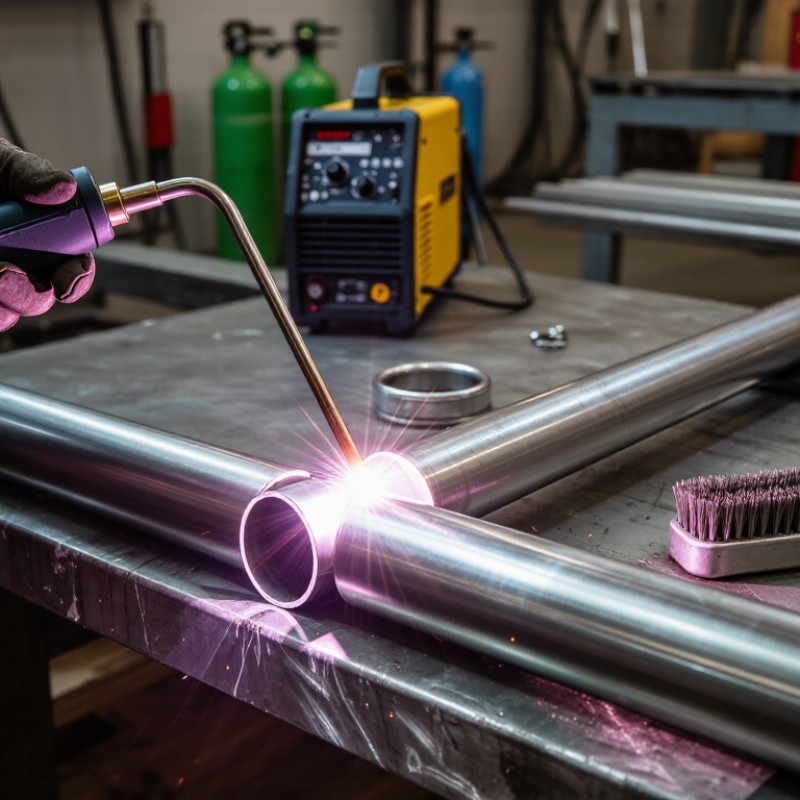
Cleanliness is critical. Remove oil, paint, moisture, and carbon-steel residue before welding. Use dedicated stainless-steel brushes and tools. Keep the arc stable. Limit heat input and avoid lingering at the joint. Excessive heat can create heavy heat tint and reduce corrosion resistance. Back-purging may protect the root during pipe or tube welding.
Small details matter.
Industry guidance, filler-metal data sheets, and qualified welding procedures should support each decision. Standards such as AWS D1.6 or applicable ISO requirements may also guide inspection and qualification. Still, no single technique fits every workshop. Even skilled welders can overlook purge leaks or hidden contamination. That is why visual inspection, cleaning, and practical testing remain essential. The following tips focus on reliable habits, common mistakes, and areas where careful adjustment can produce stronger, cleaner results.
Understanding the Properties of 304 Stainless Steel
Top Tips for Welding 304 Stainless Steel
304 stainless steel is an austenitic alloy with strong corrosion resistance and good weldability. ASTM A240 specifies approximately 18% chromium and 8–10.5% nickel for this grade. Chromium forms a thin, self-healing oxide film on clean surfaces. Nickel helps retain the austenitic structure during fabrication. It is not magnetic in its annealed condition. Slight magnetism can appear after cold working. That detail often surprises new welders.
Thermal behavior matters more than many beginners expect. ASM Handbook data list thermal conductivity near 16 W/m·K at moderate temperatures, much lower than carbon steel. Heat therefore remains concentrated near the weld. The reported thermal expansion coefficient is about 17 µm/m·K. Expect distortion, especially on thin sheet. Tack frequently. Use copper backing when practical. Keep interpass temperatures controlled. My own preference is conservative heat input, though that habit can slow production unnecessarily.
Austenitic 304 can suffer sensitization when held between roughly 450°C and 850°C. Chromium carbides may form at grain boundaries, reducing local corrosion resistance. Welding procedure qualification under ASME Section IX should verify heat input, shielding, and pass sequence. Clean stainless-only brushes and uncontaminated filler tools are essential. Even a small carbon-steel particle can leave a visible rust mark later. 304L is often selected when repeated heating is unavoidable. Still, assuming “L” solves every corrosion problem is careless; joint design, surface cleaning, and service chemistry remain decisive.
Top Tips for Welding 304 Stainless Steel: Understanding Its Properties
304 stainless steel contains significant chromium and nickel for corrosion resistance, but its relatively low thermal conductivity and high thermal expansion can increase heat buildup and distortion during welding. Use controlled heat input, clean the joint thoroughly, and maintain effective shielding gas coverage.
How to read the chart: The values show the standard chemical composition limits for 304 stainless steel in weight percent. Keep carbon low to reduce the risk of sensitization, while chromium and nickel support corrosion resistance and weldability.
Selecting Suitable Welding Equipment and Materials
Top Tips for Welding 304 Stainless Steel
Selecting suitable welding equipment and materials strongly affects the strength, appearance, and corrosion resistance of 304 stainless steel. A compact inverter welder with stable current control is usually practical for workshop fabrication. TIG equipment offers precise heat control and clean results, especially on thin sheet. MIG equipment can improve productivity on longer joints, but wire feeding must remain consistent. Use a dedicated stainless steel torch liner, clean contact tip, and properly sized cables. Small details matter.
Tips: Match the filler metal to the base material and service conditions. Common choices include 308L or 316L, depending on corrosion exposure and design requirements. Keep stainless tools separate from carbon steel tools. Even a tiny steel particle can create rust marks later. Use argon with a steady flow, and check the regulator before welding. Too much gas may cause turbulence.
Experienced welders often prepare the joint more carefully than expected. Remove oil, fingerprints, oxide, and moisture with a stainless-only brush and suitable solvent. Choose low heat input to reduce distortion and discoloration. I once underestimated heat buildup on a short seam; the joint looked acceptable, but the panel warped after cooling. Tack welds should be evenly spaced, and interpass cleaning should be deliberate. If the weld color becomes heavily blue or gray, review shielding, travel speed, and torch angle before continuing.
Preparing 304 Stainless Steel Before Welding
Top Tips for Welding 304 Stainless Steel
Preparing 304 stainless steel before welding controls many problems later. Clean the joint with a lint-free cloth and a suitable degreasing solvent. Remove oil, fingerprints, paint, and shop dust completely. Even a small contaminant can cause porosity or discoloration. Use a dedicated stainless steel brush, not one previously used on carbon steel. Embedded iron particles may create rust spots after welding.
Inspect the edges under bright light. Remove burrs, sharp corners, and heavy oxide layers with clean tools. Check the root gap and alignment before placing tacks. Uneven fit-up often increases heat input and distortion. Thin sheets may need copper backing or careful clamping. Keep the parts dry. Moisture near the joint can affect shielding and weld quality.
Tips: Plan the weld sequence before striking an arc. Short, balanced welds usually reduce distortion. Confirm the shielding gas flow, hose connections, and purge arrangement when the joint requires backside protection. Avoid touching prepared surfaces with bare hands. I still recheck clean joints before welding; preparation can look complete while a faint oily mark remains. That extra inspection feels slow, but it has prevented more than one avoidable repair. Keep filler material clean and matched to the approved welding procedure. Record unusual fit-up or heat-control issues for the next job.
Choosing Proper Welding Methods and Settings
Top Tips for Welding 304 Stainless Steel
Choosing the proper method and settings matters more than simply increasing amperage. For thin 304 sheet, GTAW with DCEN gives clean arc control and narrow heat input. A practical starting point is 60–90 amps for 1.0–1.5 mm material, using 1.6 mm low-carbon stainless filler. Set argon flow near 8–12 L/min, then adjust for drafts and torch distance. The ASM Handbook reports 304 thermal conductivity near 16 W/m·K at room temperature, so heat can remain concentrated around the joint.
For thicker sections, GMAW can improve production speed. Short-circuit transfer often begins around 18–22 volts and 100–160 amps, but joint fit-up changes everything. Use a qualified welding procedure, not a copied machine setting. AWS D1.6 emphasizes controlled heat input, suitable filler selection, and cleaning between passes. Keep the interpass temperature below about 175°C unless the procedure allows otherwise. Too much heat may encourage sensitization between roughly 450°C and 850°C.
Clean the joint with dedicated stainless tools. Remove oil, marking ink, and trapped moisture. I prefer short beads and brief pauses rather than weaving widely. That approach reduces distortion near the toe. My own early welds sometimes looked bright but failed visual inspection because the root lacked fusion. A wider bead is not always stronger. Review the weld profile, gas coverage, and heat input before changing amperage. Small adjustments often work better.
Inspecting, Cleaning, and Finishing the Weld
After welding 304 stainless steel, let the joint cool naturally before inspection. A bright surface can mislead you. Use strong white light and inspect the full bead, toes, and root. Look for cracks, undercut, overlap, pinholes, arc strikes, and uneven penetration. Check the heat tint around the weld. Light straw coloring may be acceptable in some conditions, but dark blue or black oxide often indicates excessive heat or poor shielding. Measure critical dimensions with suitable gauges, not eyesight alone. If the root is inaccessible, visual inspection cannot prove internal soundness.
Remove spatter with methods that will not gouge the stainless surface. Use a clean, lint-free cloth and a chloride-free solvent. A brush reserved for stainless steel helps prevent iron contamination. Avoid carbon steel brushes, dirty grinding discs, and shop rags carrying metal dust. Clean the surrounding area, too. Small particles can cause rust stains later. The surface should feel smooth, not greasy.
Finish the weld according to the required service and appearance. Blend high spots gradually with clean abrasive tools, keeping the surrounding metal flat. Do not chase a mirror finish if the part needs a functional surface instead. Heat tint may require controlled mechanical cleaning or qualified chemical treatment. Follow the applicable procedure and rinse thoroughly. I have seen attractive welds fail close inspection because finishing hid shallow undercut. That remains a useful warning. Record defects, corrective work, and the final inspection result while the evidence is clear.